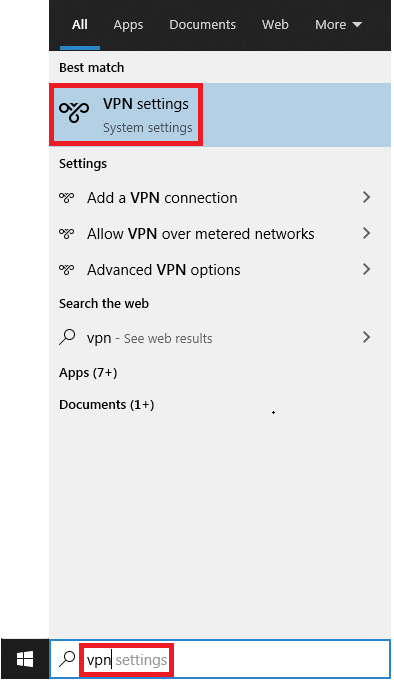
In the bottom left corner of your taskbar, click on either the Windows icon or the magnifying glass – select and search for VPN Settings
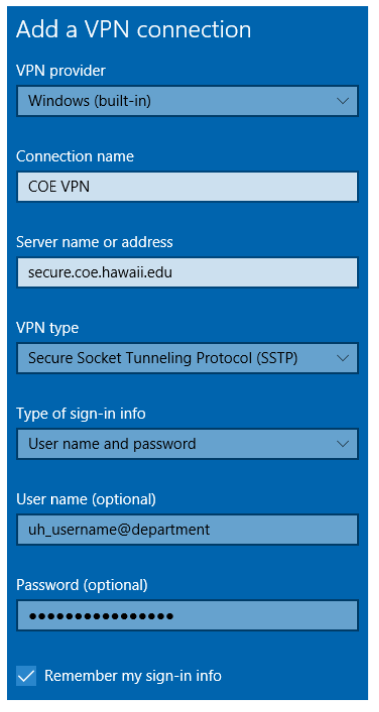
Select Add a VPN connection

Fill out Add a VPN connection:
- VPN provider: Windows (built-in)
- Connection name: COE VPN
- Server name or address: secure.coe.hawaii.edu
- VPN type: Secure Socket Tunneling Protocol (SSTP)
- Type of sign-in info: User name and password
- User name: Supplied by the COE VPN Registration Tool (it will look like your_uh_username@department)
- Password: Your UH password
- Remember my sign-in info: Checked
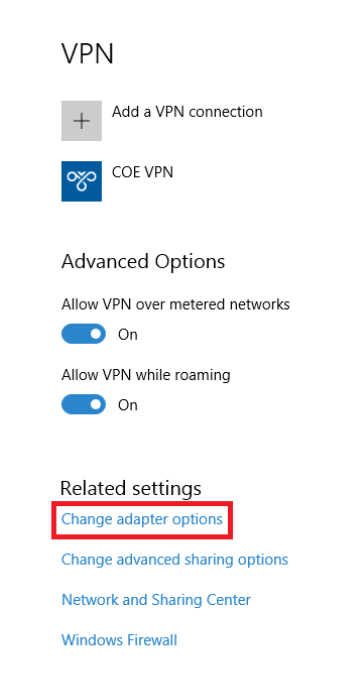
Return to VPN tab of Settings menu, then select Change adapter options
This will send you to Network Connections
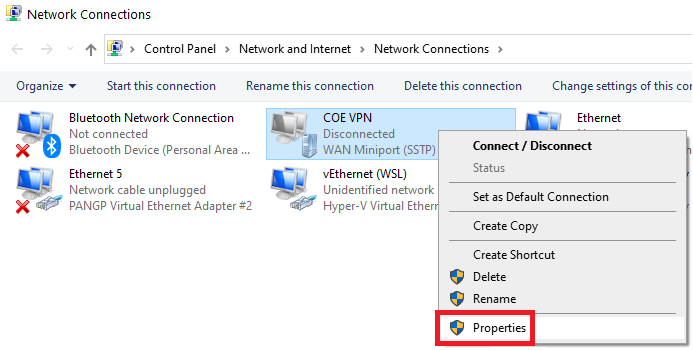
Right-click the newly added COE VPN, select Properties from right-click menu
Select the Security tab, then:
- Select Allow these protocols
- Check Unencrypted password (PAP)
- Uncheck Microsoft CHAP Version 2 (MS-CHAP v2)

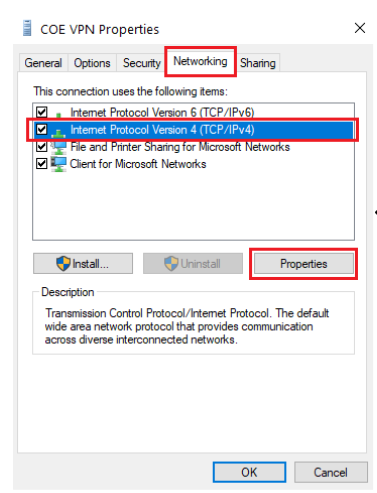
Select Networking tab, then check Internet Protocol Version 4 (TCP/IPv4)
Go to Properties
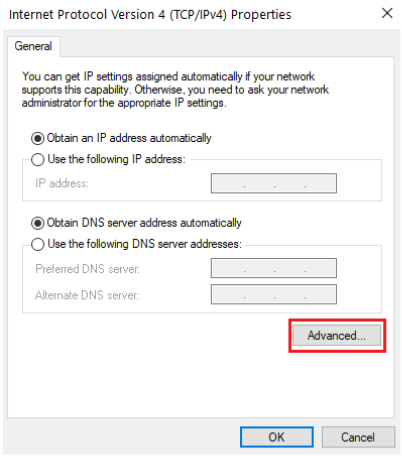
Select Advanced…
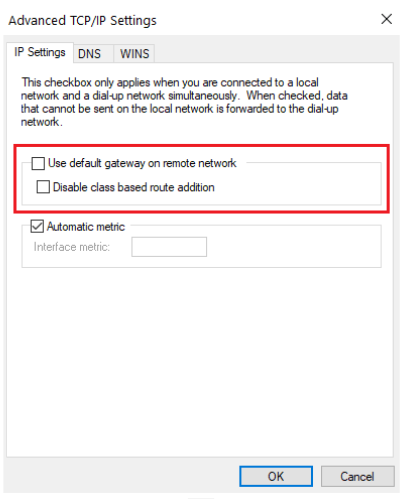
Uncheck Use default gateway on remote network and Disable class based route addition
Then select OK (on 3 separate dialog windows) to complete setup
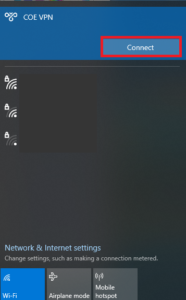
Now that set up is complete, left-click the network icon in the bottom right corner of the task bar
![]()
Selecting COE VPN should connect you to the COE VPN
Disconnect by clicking on COE VPN – Disconnect